WAR Installation
From LogicalDOC Community Wiki
(Redirected from HTTPS Installation)
Upload WAR File
- Open a Web browser such as Firefox or Internet Explorer
- In the browser's address bar, type https://logicaldoc.mydomain.com/manager/html and press Enter
Note: Point to the server that hosts Logicaldoc using either the FQDN or the IP address.
- Type ldocmanager for the username, then type in the password
- Click OK
- Scroll down to the Deploy section
- Click Browse to select the WAR to upload
- Browse to where logicaldoc.war is located, click Open
- Click Deploy
- Message: OK should be displayed under the Tomcat Web Application Manager title
Upload Email Plugin
- Open an Ubuntu terminal and type cd and press Enter
- Type wget http://downloads.sourceforge.net/logicaldoc/logicaldoc-email-4.0.0-plugin.zip?modtime=1232733048&big_mirror=0
- Press Enter
- Type sudo cp logicaldoc-email-4.0.0-plugin.zip /var/lib/tomcat6/webapps/logicaldoc/WEB-INF/plugins/
- Press Enter
- Type sudo chown tomcat6:tomcat6/var/lib/tomcat6/webapps/logicaldoc/WEB-INF/plugins/logicaldoc-email-4.0.0-plugin.zip
- Press Enter
Create Directory for Logicaldoc Documents
- In an Ubuntu terminal, type sudo mkdir /opt/Logicaldoc/ and press Enter
- Type sudo chown tomcat6:tomcat6/opt/Logicaldoc and press Enter
Setup Logicaldoc
- Open a Web browser
- Type https://logicaldoc.mydomain.com/logicaldoc/setup in the browser's address bar and press Enter
Note: Point to the server that hosts Logicaldoc using either the FQDN or the IP address
- Type ldocadmin for the user name and type the password
- Click OK
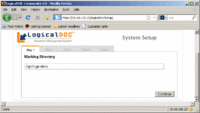
- In LogicalDOC's system setup, type /opt/Logicaldoc in the Working Directory field and click Continue
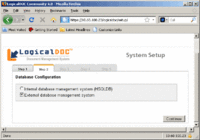
- Enable the radio button for External database management system, click Continue
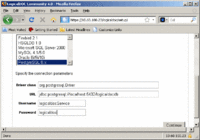
- Select database type and fill in the information for the server, user name, and password, then click Continue
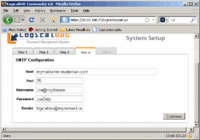
- Type in the information for the mail server, click Continue
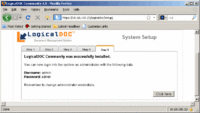
- Click the Click here button to exit the setup and proceed to the Logicaldoc log in
