Installation using MariaDB: Difference between revisions
| (11 intermediate revisions by the same user not shown) | |||
| Line 4: | Line 4: | ||
== Update Current Packages == | == Update Current Packages == | ||
It is assumed that the user is logged in and has sudo | It is assumed that the user is logged in and has sudo access. For information on giving a user sudo access visit Liquidweb page on [http://www.liquidweb.com/kb/how-to-add-a-user-and-grant-root-privileges-on-ubuntu-14-04/ How to Add a User and Grant Root Privileges on Ubuntu 14.04]. | ||
These steps are performed from the command line. | |||
<source lang="bash"> | <source lang="bash"> | ||
| Line 28: | Line 30: | ||
java -version | java -version | ||
</source> | </source> | ||
The output should be similar to: | |||
[[File:Java-version-ubuntu.png]] | |||
== Install MariaDB == | == Install MariaDB == | ||
| Line 61: | Line 66: | ||
=== Verify that MariaDB is operational === | === Verify that MariaDB is operational === | ||
After installation, run <code>mysql -u root -p</code> | After installation, run <code>mysql -u root -p</code><br/> | ||
Enter your password when prompted. You will see output similar to the following: | |||
[[File:MariaDB-monitor.png]] | |||
Congratulations, you have successfully installed MariaDB. If you instead received an error, retry by running the following command: | Congratulations, you have successfully installed MariaDB. If you instead received an error, retry by running the following command: | ||
| Line 134: | Line 131: | ||
In this case you must pay attention to choose MySQL as database engine and then to enter username and password of MariaDB's root user we have previously installed | In this case you must pay attention to choose MySQL as database engine and then to enter username and password of MariaDB's root user we have previously installed | ||
<gallery> | |||
File:Console-installer-Database-01.png|database choice | |||
File:Console-installer-Database-02.png|database connection settings | |||
</gallery> | |||
== Configure Service for Reboot == | == Configure Service for Reboot == | ||
To start LogicalDOC at server bootstrap you need to copy the startup script into your system initialization directory so execute the command: | |||
<source lang="bash"> | |||
sudo cp /LogicalDOC/bin/logicaldoc /etc/init.d | |||
sudo chmod 755 /etc/init.d/logicaldoc | |||
</source> | |||
Then edit the file <code>/etc/init.d/logicaldoc</code> adjusting the paths. | |||
Save the file and execute the commands: | |||
<source lang="bash"> | |||
sudo update-rc.d logicaldoc defaults | |||
sudo service logicaldoc start | |||
</source> | |||
Now you can access the program using the browser, pointing it to http://localhost:8080/<br/> | |||
Use the credentials admin/admin (username/password) to enter the first time. | |||
Latest revision as of 16:51, 9 September 2016
LogicalDOC CE 7.5.1 has been successfully installed on Ubuntu 14.04 Server using MariaDB 10.1.
This install was on a vanilla install of Ubuntu 14.04 LTE 64bit Server. The steps below follow what I did to configure Ubuntu for LogicalDOC.
Update Current Packages
It is assumed that the user is logged in and has sudo access. For information on giving a user sudo access visit Liquidweb page on How to Add a User and Grant Root Privileges on Ubuntu 14.04.
These steps are performed from the command line.
sudo apt-get update
Setup Oracle Java 8
These simple steps have been retrieved from: How to Install Oracle Java 8 on Ubuntu 14.04 LTS
Add the WebUpd8 Team Personal Package Archive (PPA)
Add the PPA:
sudo apt-add-repository ppa:webupd8team/java
The Installation
sudo apt-get update
sudo apt-get install oracle-java8-installer
Check Installation
java -version
The output should be similar to:
Install MariaDB
Brief introduction MariaDB 5.5 corresponds to version 5.5 of MySQL, MariaDB 10 instead corresponds essentially to the 5.6 version of MySQL. Initially we had thought to install on the system MariaDB version 5.5 using the instructions published at this address https://www.liquidweb.com/kb/how-to-install-mariadb-5-5-on-ubuntu-14-04-lts/ Afterwards, having verified the availability of newer versions we opted to install MariaDB 10.1 following the instructions published by this other address https://www.vultr.com/docs/install-mariadb-on-ubuntu-14-04
Add the MariaDB Repository
sudo apt-get install software-properties-common
To find which repo you should use with the MariaDB repository generator. We’re going to add the Ubuntu 14.04 “trusty” MariaDB 10.1 repository.
Import the public key and add the MariaDB repository:
sudo apt-key adv --recv-keys --keyserver hkp://keyserver.ubuntu.com:80 0xcbcb082a1bb943db
sudo add-apt-repository 'deb http://mirror.jmu.edu/pub/mariadb/repo/10.1/ubuntu trusty main'
Install MariaDB
Once the key is imported and the repository added you can install MariaDB with:
sudo apt-get update
sudo apt-get install mariadb-server
Verify that MariaDB is operational
After installation, run mysql -u root -p
Enter your password when prompted. You will see output similar to the following:
Congratulations, you have successfully installed MariaDB. If you instead received an error, retry by running the following command:
sudo service mysql start
Install Third Parties Components
LogicalDOC Community needs a couple of additional commands in order to produce the thumbnail of documents. These are two very common and easy to install packages: ImageMagick and Ghostscript. The first is used for image manipulation, and the second to convert PDF documents to image.
sudo apt-get install ghostscript
sudo apt-get install imagemagick
Check version and installation path
The first command will show the location path where the ImageMagic command convert is located. You need to record this path because you will need it during LogicalDOC installation.
whereis convert
convert –version
Install LogicalDOC Community
Download LogicalDOC Installer from SourceForge
The LogicalDOC Community project is hosted on SourceForge at: https://sourceforge.net/projects/logicaldoc/]
The downloads of the latest release version 7.5.1 are available at: https://sourceforge.net/projects/logicaldoc/files/distribution/LogicalDOC%20CE%207.5/
We choose to download the package logicaldoc-community-installer-7.5.1.zip using the direct link
wget http://downloads.sourceforge.net/project/logicaldoc/distribution/LogicalDOC%20CE%207.5/logicaldoc-community-installer-7.5.1.zip
Uncompress the installer
Make a temporary folder and uncompress there the installer
sudo mkdir tmpldisntaller
sudo mv logicaldoc-community-installer-7.5.1.zip tmpldisntaller/
cd tmpldisntaller/
unzip logicaldoc-community-installer-7.5.1.zip
Launch the installation
Create an empty folder on the root of the Filesystem
sudo mkdir /LogicalDOC
Launch the setup installer
sudo java -jar logicaldoc-installer.jar
One of the most important things of this installation is the specification of the database engine that LogicalDOC will use to store its data
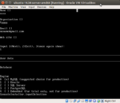
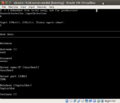
In this case you must pay attention to choose MySQL as database engine and then to enter username and password of MariaDB's root user we have previously installed
-
database choice
-
database connection settings
Configure Service for Reboot
To start LogicalDOC at server bootstrap you need to copy the startup script into your system initialization directory so execute the command:
sudo cp /LogicalDOC/bin/logicaldoc /etc/init.d
sudo chmod 755 /etc/init.d/logicaldoc
Then edit the file /etc/init.d/logicaldoc adjusting the paths.
Save the file and execute the commands:
sudo update-rc.d logicaldoc defaults
sudo service logicaldoc start
Now you can access the program using the browser, pointing it to http://localhost:8080/
Use the credentials admin/admin (username/password) to enter the first time.


