Difference between revisions of "Changing Java Virtual Machine On Windows"
From LogicalDOC Community Wiki
Jump to navigationJump to search (Created page with "Assuming '''<LDOC_HOME>''' the installation folder of LogicalDOC (eg: C:\LogicalDOC). '''''Open a Command Prompt with elevated privileges (Run as Administrator)''''' and execu...") |
|||
| Line 13: | Line 13: | ||
[[Image:java-virtual-machine.png]] | [[Image:java-virtual-machine.png]] | ||
| − | In the field '''Java | + | In the field '''Java Virtual Machine''' choose the path where is the '''jvm.dll''' file of the Java runtime you want to use.<br /> |
When done click on '''Apply''' and restart the '''LogicalDOC''' service | When done click on '''Apply''' and restart the '''LogicalDOC''' service | ||
Revision as of 09:52, 4 March 2024
Assuming <LDOC_HOME> the installation folder of LogicalDOC (eg: C:\LogicalDOC). Open a Command Prompt with elevated privileges (Run as Administrator) and execute these commands:
cd C:\LogicalDOC\tomcat\bin
LogicalDOCw.exe //MS//LogicalDOC    (if you do not have LogicalDOCw.exe use tomcat8w.exe instead)
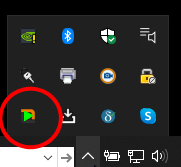
A new tray icon with the LogicalDOC logo appears:

Right click on it and choose Configure...
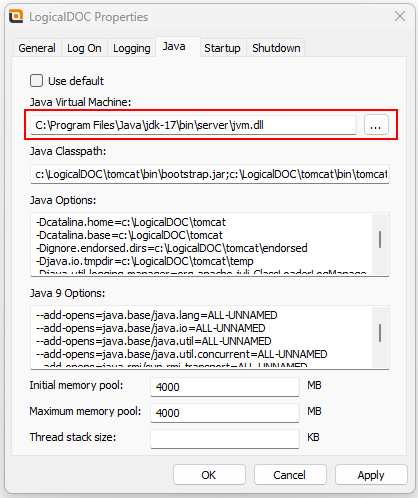
Now open the Java tab:

In the field Java Virtual Machine choose the path where is the jvm.dll file of the Java runtime you want to use.
When done click on Apply and restart the LogicalDOC service